Apply a Form Pattern and Add a data source to a form
Table of Content:
Apply a Form Pattern
Form patterns are an integrated part of the form development experience. These patterns provide form structure based on a style, which includes required and optional controls. The patterns also provide many default control properties. While applying a form pattern is not a required part of the form development process, we recommend it as a best practice. In addition to top-level form patterns, subpatterns can be applied to container controls and provide guidance and consistency for sub content on a form, such as a FastTab.
Patterns make form development easier by providing a guided experience to ensure that the forms are correct and consistent. Patterns help validate form and control structures and validate the use of controls in some places. Patterns also help guarantee that each new form that a user encounters is immediately recognizable in appearance and function. Because patterns provide many default layout properties, forms help ensure a responsive layout. Finally, patterns also help guarantee better compatibility with patches, hotfixes, and upgrades.
Many of the form styles and templates from Microsoft Dynamics AX 2012 continue to be supported in finance and operations apps. If a legacy form style or template is no longer supported, there is likely a migration path to a current pattern.
Many form patterns are used in finance and operations apps. The following list highlights the most common patterns that you will encounter and develop. For a full list of supported form patterns and subpatterns, go to the Summary unit of this module.
- Simple List pattern - Used to maintain data for entities that contain six or fewer fields and no parent/child relationships.
- Simple List and Details pattern - Used to maintain data for entities that contain six or more fields.
- Simple Details pattern - Used to present a simple set of fields to the user; generally, it is in view mode instead of in edit mode.
- Master Details pattern - Used as a primary method for entering data. Users can view and edit data that is organized into expandable and collapsible FastTabs.
- Details Transaction pattern - Used to present data details in a Header view and a Line view.
- List Page pattern - Used to present data in a manner that is optimized for browsing records and allows the user to take action on a specific record.
- Table of Contents pattern - Used when at least two forms are required for setup configuration.
- Workspace pattern - Used to create a finance and operations apps workspace, which is a grouping of tasks and specific pages that are used for significant business activity.
- Wizard pattern - Used to guide a user through a specific task by using an ordered series of tab pages.
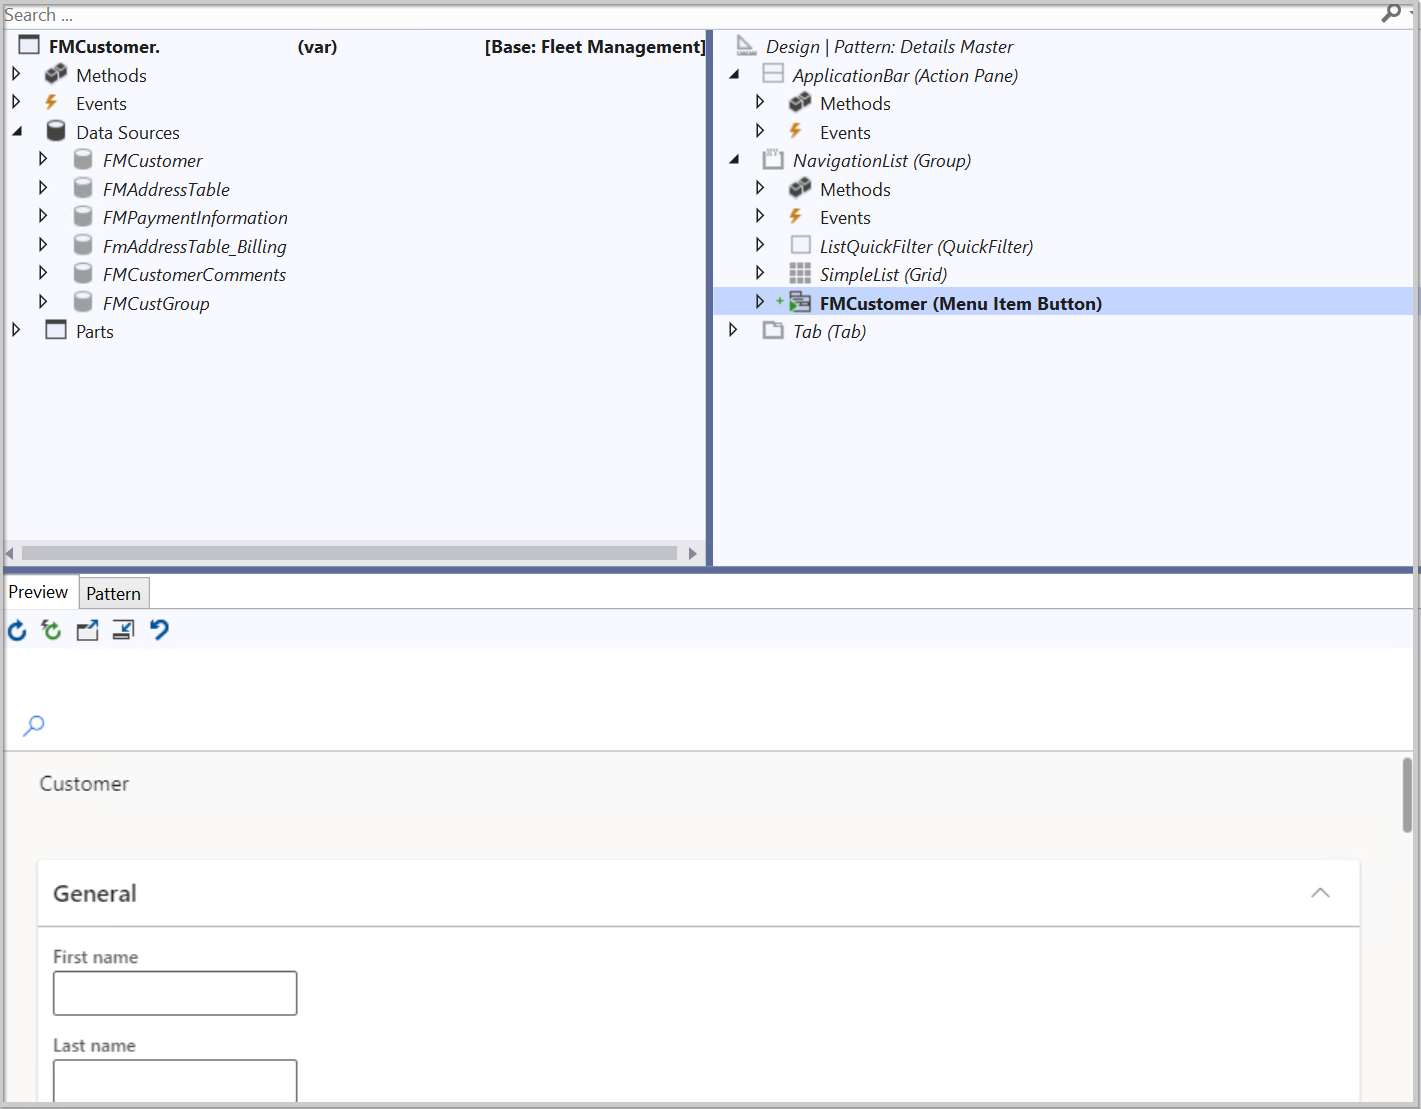
In Visual Studio, a form is added to a project in the Solution Explorer window. The form designer window looks different from other element designers because of the additional panes.

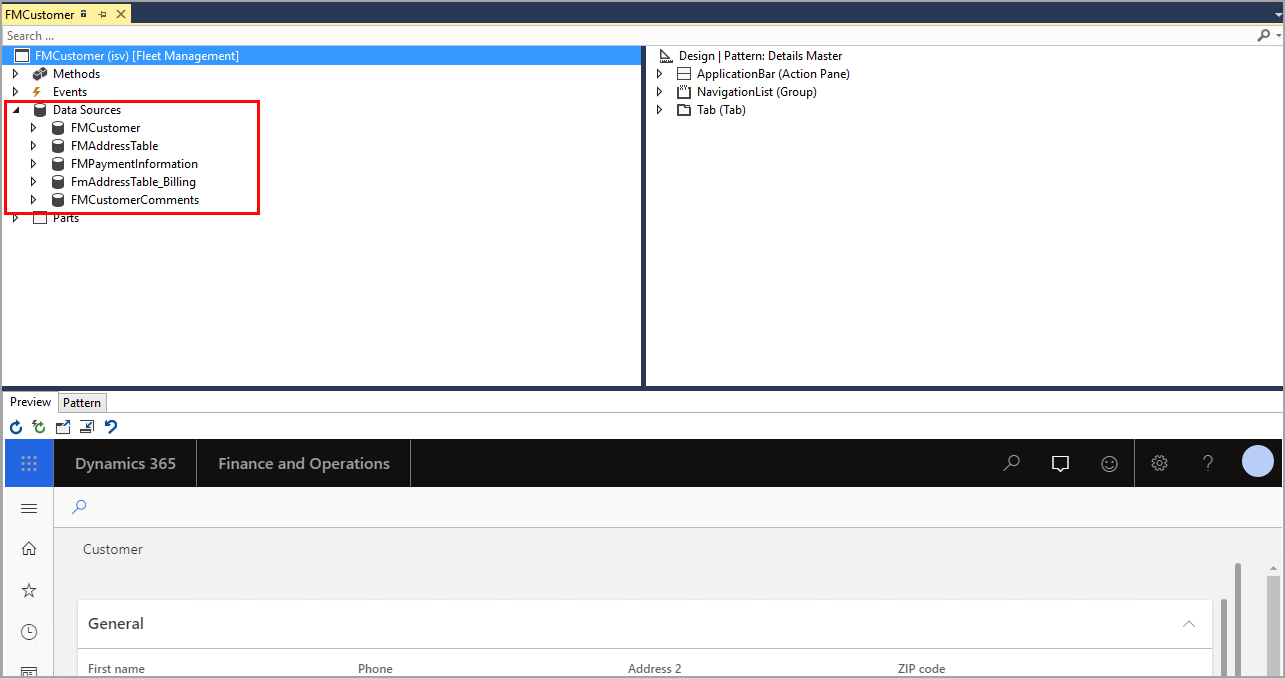
The left and right panes are used to manage the form and design options, while the bottom pane shows the pattern design as well as a preview of how the form is viewed in the user interface. The form's left pane is used to manage methods, events, and data sources, while the right pane is used to apply patterns and subpatterns. The bottom pattern pane is like a wizard because it guides you through the necessary steps to complete the pattern. If elements are added in a different order than what the pattern pane commands or not all the elements are added, you will encounter errors when performing a build.
The following video shows how to add a form to a project and apply a pattern to the form:
Add a data source to a form
To display content on a page in the user interface, a data source must be added to a form in the form designer window of Visual Studio. You can select and drag a table or query from your project in the Solution Explorer window or drag a system table from the Application Explorer window. You can choose to use one table or many tables, depending on the number of fields that you will use for your form.

Follow these steps to add a data source from the Application Object Tree (AOT) to your form by using a select and drag process:
- Ensure that your form is open in the form designer window in Visual Studio.
- In the Application Explorer window, expand the AOT node. You can view the Application Explorer window by going to View > Application Explorer.
- Expand the Data Model node.
- Expand the Tables or Table Extensions node, depending on the type of data source that you are adding.
- Select and drag your desired table from the AOT node to the Data Sources node in the left pane of the form designer window.

Alternatively, you can add a data source to your form by using the Data Sources node in the form designer.
Follow these steps to add a data source from your project:
- Ensure that your form is open in the form designer window in Visual Studio.
- In the left pane of the designer, right-click the Data Sources node and select New Data Source.
- Select DataSource1 under the Data Sources node and go to the Properties window.
- Select your table in the Table property drop-down menu. You can also select any table from the AOT node in this menu.
Add grids, fields, and groups to a form
When a table is listed under the Data Sources node on the left pane of the Form designer window, it can then be used to add fields to the Grid node of the pattern design. The pattern that you select will determine the presence and/or location of the grid. Individual fields can also be dragged from the Fields node under the individual table in the Data Sources node to the right pane in the Grid node under the Design node.
A grid contains columns and rows and will display to the user as a table in a finance and operations apps page. Groups are part of multiple form patterns and are added to the form as filters. You can add quick filters and customer filters by applying a subpattern to the Group control.
Follow these steps to add more controls to your form:
- In Visual Studio, ensure that you have applied your desired form pattern by right-clicking the Design node on the right pane and selecting Apply pattern.
- After adding a data source by following the steps in the previous unit, you will now begin adding controls to the form by following the steps in the correct order on the Pattern tab on the bottom pane of the form designer window. For example, in a Simple List form pattern, you need to add an Action Pane, then a Group, and lastly, a Grid.
- Right-click the Design node on the right pane of the form designer and select New > Action Pane.
- Right-click the Design node and select New > Group. Notice that the Group control requires a pattern. Based on the form type, you will choose a desired subpattern.
- Right-click the Design node and select New > Grid.
- From the left pane, expand the Data Sources node and then expand your table.
- Expand the Fields node of your table.
- Select the fields that you want displayed in the grid on your form, in the order that you want them displayed in the form. You can select multiple fields by using the Ctrl key.
- Drag the selected fields from the Fields node on the left pane to the Grid node on the right pane.
For the Simple List form pattern, you have now fulfilled all necessary controls. Depending on your selected form pattern, there could be additional required controls and subpatterns.